Tuesday 22 January 2008

Once upon a tag...


front back

I don't often say this, though it's often true, and in this case it's more true than ever.... this looks a lot better in the flesh than when photographed!!

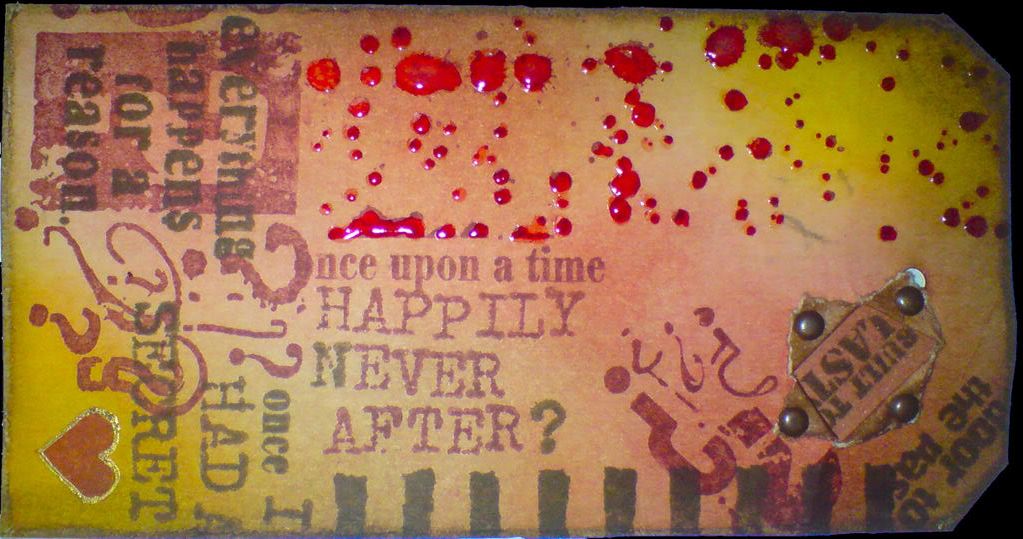
This tag started out as something very different. My plan was to make some tags using predominantly PaperArtsy stamps. Once I got under way, (and I don't know if this ever happens to you, dear reader), it quickly developed a mind/voice of it's own, and I just went with it! I did manage to largely confine it to PaperArtsy stamps, though I did use a few others when my limited PaperArtsy collection didn't yield up the right images.

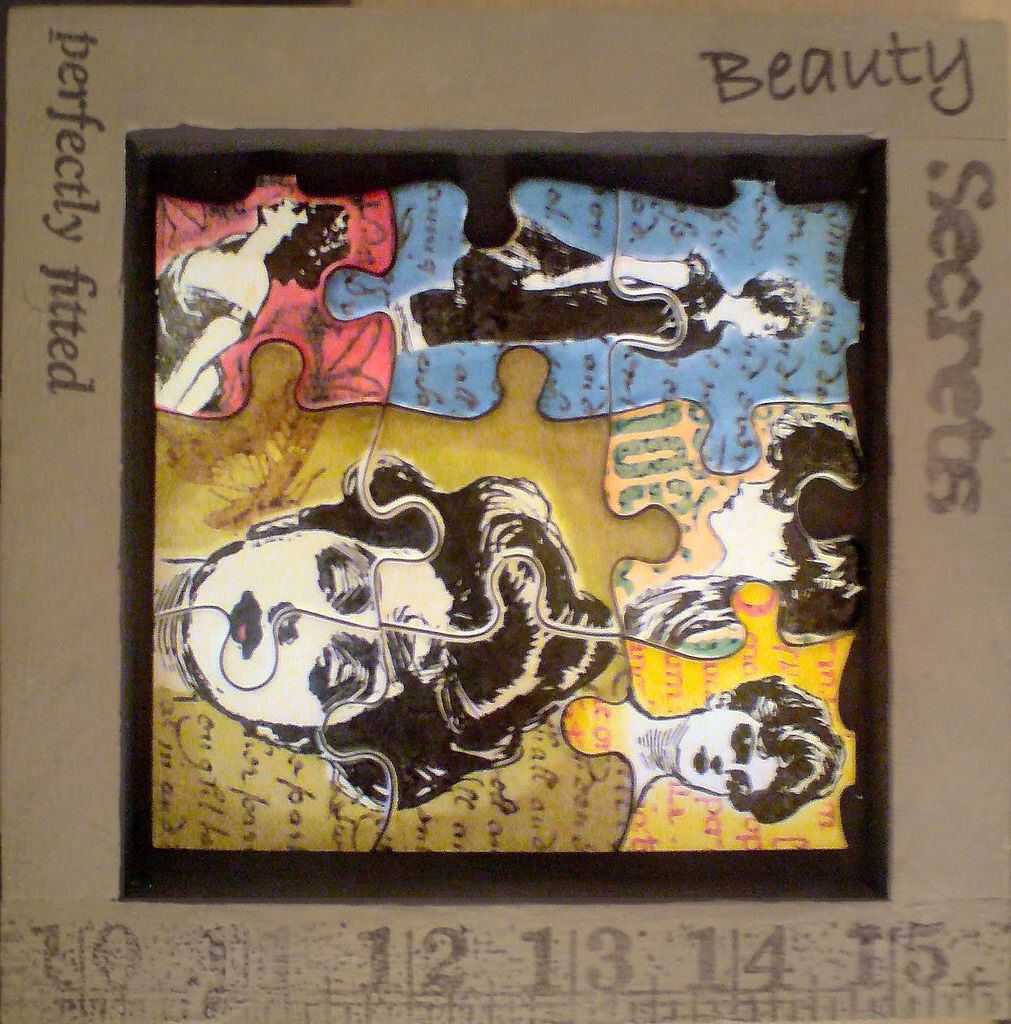
The jigsaw piece was created using the Batik technique I explored in my last posting. The splatter stamps were highlighted with glossy accents and the copper bookplate was distressed with espresso and a greenish dabber (I forget the name of the colour). A portion of the back of each side was decorated so that when the tag was torn and the edges held back by brads, they wouldn't be white.

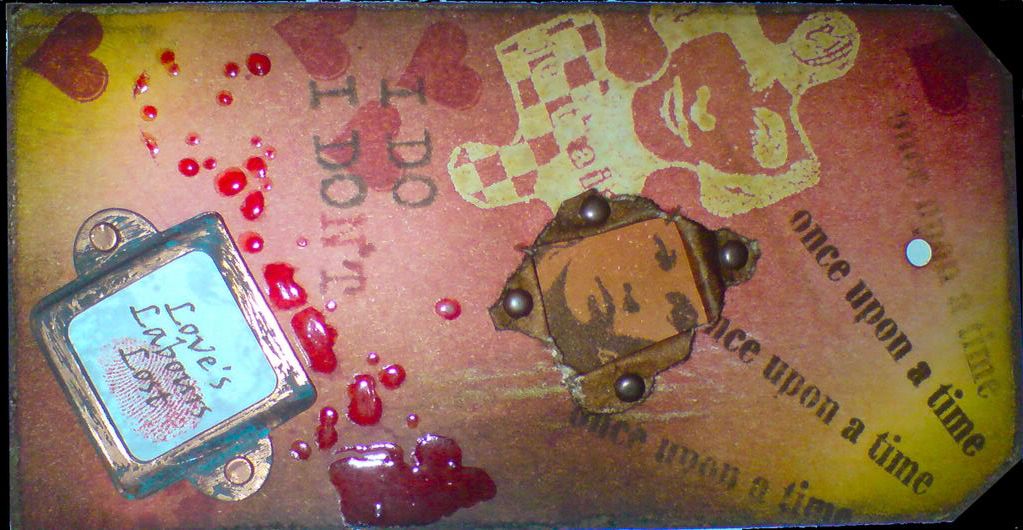
The heart on the back of the tag was outlined with a Sakura Gold-Touch pen. The words "Love's Labours Lost" were printed out in brown from the PC, and stamped with an image in clear embossing ink, which was then allowed to dry to give a watermark effect. The fingerprint is the artist's own :o)

I hope you like it. Click on any image to enlarge it.

Sunday 20 January 2008

Batik Style Tags

These 3 tags use the batik tag technique explained by Tim Holtz on his blog. I used a selection of his stamps, my bird stamps and a couple of others from other sources.

Basically, each tag is stamped in a pale distress ink colour and then clear embossed. Using cut'n'dry foam, the tag is inked with darker distress inks, with the embossing acting as a resist.

Brown paper or newsprint is then placed over the embossing, and it is ironed with a hot iron until the embossing powder melts again and is soaked into the brown paper.

Finally, other images were stamped onto the tag, the edges were distressed by filing them and then applying walnut distress ink.

I hope you like them! Click on any image to enlarge it.

Saturday 19 January 2008

Garden Jigsaw Frame

Sorry about the camera flash glare on this one, I'm certainly no David Bailey! LOL

Pound shop blank jigsaw and art shop shallow wooden box, enrichened by some great stamps and a chipboard flower from the Artistic Stamper.

Jigsaw stamped in stazon and coloured using distress inks and a water brush. The flower in the top left corner was subsequently masked out and the background was coloured then stamped with a text mat.

The inside of the frame was tinted with brushed corduroy distress ink, and the outside painted with old paper crackle paint and stamped with another text mat in brushed corduroy.

The flower was coloured with mustard seed distress ink and mounted with 3d foam onto the frame.

I hope you like it! Click on the image to enlarge it.

Wednesday 16 January 2008

Grungeboard Valentine Notebook


A couple of firsts in this project.... my first time using grungeboard, and my first time using the bind-it-all to make something with more than just 6 holes in it!

The covers are white mountboard, inked with fired brick, aged mahogany and walnut stain distress inks. The crackle pattern was stamped with walnut ink too. The edges were distressed with my new needle file set from B&Q - a real bargain, a set of assorted small files, very like the Basic Grey file set but with 6 files rather than 4, and under £3 - perfect for distressing paper/card/board etc.

The hinges were taken from the plain grungeboard elements set, coloured with a brown marvy brush marker and fixed to the covers with d/s tape then bradded at one end for an accent.

The heart and wings were from the same set. The heart was inked and stamped in the same was as the covers, the wings were painted with white acrylic paint, edged with walnut stain ink applied with cut'n'dry foam and accented with a grey brush marker. The gold board was a remnant from a previous project, coloured with moonglow spritz ink.

The pages inside were taken from a pack of 5x3 record cards I got in a £ shop.

I hope you like it! Click on any image to enlarge it.

Saturday 12 January 2008

Beauty Secrets

I finally got to have a go with the Gibson Girls stamps from the Artistic Stamper tonight. Not the kind of subject matter I'd usually go for, but the images were so strong and suitable for a stark monochrome approach that they instantly appealed to me. This project hasn't photographed that well, but hopefully it's clear enough for you to see what's going on!

The frame was painted inside with espresso dabber and outside with frayed burlap crackle paint. It was then stamped with walnut stain and black staz-on.

The blank jigsaw was a pound shop bargain that I've had stashed away for a while until the right project came along!

The Gibson girl images were stamped on the puzzle using black staz-on (there is a slight gloss to the puzzle, so staz-on was the best option). They were then stamped again onto thin card and cut out to make masks. One by one, each mask was placed exactly over the same image on the puzzle pieces to protect the black and white faces. The pieces were then tinted and stamped with distress inks. Each piece was mounted onto 3d foam and fixed in place inside the frame.

I hope you like it! :o) Click on the image to enlarge it.

Friday 11 January 2008

A Dream of Sunflowers

I enjoyed making the last shadow box so much, I thought I'd have a go at another one, again using stamps from the Artistic Stamper.

The inside of the frame was painted with espresso paint dabber and the outside was painted with scattered straw crackle paint which was rubbed with walnut stain distress ink when dry.

To create the flower on the edge of the frame, I applied faded jeans and peeled paint distress ink to card and then over-stamped with walnut stain, ensuring the stem part of the stamp was on the green area and the flower was on the blue.

The background cards inside the frame were tinted with various shades of distress ink, water spritzed, crumpled and ironed flat.

The flower on the right was stamped with walnut stain distress ink, and the stem was coloured with a water brush and acrylic paint. The flower was stamped in walnut stain on card previously coloured with a yellow distress ink (I forget which one!). It was then cut out and placed on the background.

The flower on the left was stamped in walnut ink on the background card, then restamped card that had been tinted yellow, cut out and fixed into place.

The copper bookplate was painted with expresso paint dabber (and a green-ish verdigris type colour on the right hand edge, I forget the name), then sanded with an emery board to reveal the copper beneath. The text (which means "a dream of sunflowers") was printed out from computer in dark brown ink.

The eyelets were ... um... eyeletted into place (breaking my cropodile in the process (sob!)).

And there you have it, a dream of sunflowers! I hope you like it :o) Click on the image to enlarge it, more to follow....

Tuesday 8 January 2008

Crackle Frame Shadow Box


I thought I'd try something a bit different today - a shadow box. I bought a few of these frames a while back and have been waiting for an excuse to have a go at one! All stamps used in this project were from the Artistic Stamper, as were the watch parts.

The inside of the frame was painted with espresso paint dabber, and the front and outer edges with frayed burlap crackle paint. When the crackle paint had dried, I applied walnut stain distress ink to it to accentuate the cracks in it. The "Time is..." phrase was stamped with black Staz-on. The crackles don't show up that well in this photo, but they're there, believe me!

The background card inside the frame was tinted with walnut stain distress ink applied with Cut'n'Dry foam and then flicked with water to produce lighter spots on it. I then crumpled it up, flattened it slightly, then rubbed it lightly more walnut ink to highlight the crumple folds. I then turned it over, spritzed it with a little water and ironed it flat (yes, yes... I know.... enough already! Those of you that know me find it hard to imagine me with an iron in my hand, but you have to believe me, it's true! Would I lie to you, dear reader?) For some reason that I have not yet fathomed, this produced light blue/grey marks where the crumples had been. I'm not complaining, I think it looks great, I just wish I knew how it had happened!

The card was then stamped with a calligraphic mat and tape measure stamp in brushed corduroy distress ink, and glued into the frame.

The watches were created as follows (going from right to left):
  • stamped in walnut stain distress ink
  • stamped and embossed with gold embossing powder then tinted with walnut ink
  • stamped with black Staz-on onto acetate, run through a Xyron sticker-maker to make the back sticky, then gold leaf was applied to the back. It was then scrubbed with a rough brush to distress it slightly.
The watches were layered with 3d foam pads.

The watch face and glass were layered in the lower left corner with a spiral paper clip, tinted with gold Krylon pen.

The key in the top right corner was a real one I had lying around the house, which was suspended from jute twine and held in place with 2 drawing pins coloured with a copper Krylon pen.

The chipboard key was from Maya Rd. It was coloured with gold Krylon, sanded to distress the edges and gently edged with walnut distress ink. It doesn't show up well in this photo, but the word ORIGINAL was then stamped onto the key using black Staz-on ink.

And that's about it! It took a fair while to make, but I'm really pleased with it. I hope you like it too! :o)

Monday 7 January 2008

Artistic Stamper Insect ATCs


Hello again dear reader, after a lengthy Christmas break! I hope the holiday season was as good for you as it was for me.

It's been all excitement here at Dan Towers - on New Year's Eve I found out that I'd been voted Crafter of the Year by the members of the Craft Swap Forum. I'm particularly thrilled about that because all of the people nominated were so talented and any of them would have been a worthy winner.

In addition, I've been invited to join the design team for The Artistic Stamper, an invitation which I was delighted to accept! The 3 ATCs shown here are the first things I've made using some of their beautiful stamps.

The insects were stamped with Staz-on onto acetate and coloured using solvent based pens and alcohol inks. The insides of the slide mounts were tinted with walnut stain distress ink and spritzed with Moonglow mist ink to give a bit of a gold shimmer. The slide mounts and background cards were tinted with walnut stain ink and stamped with one of the Artistic Stamper's calligraphic mats in brushed corduroy distress ink, and a vintage tape measure stamp. The quotes were computer printed and mounted onto black card.

I hope you like! Click on any image for a larger view. More to follow... :o)
Related Posts with Thumbnails